|
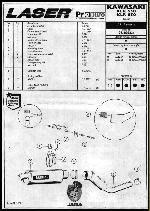
Additional Hardware Used During Installation
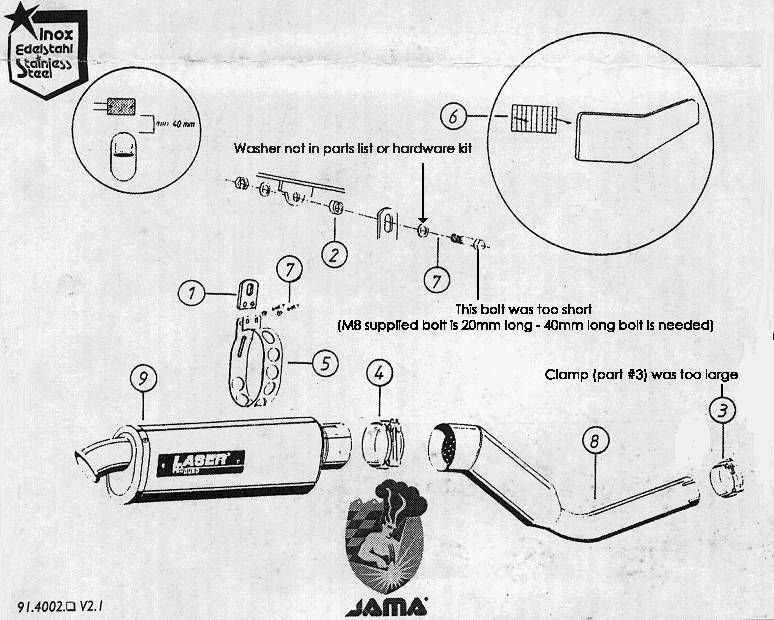
1 M8 x 40 mm Stainless Steel Bolt
1 M8 Stainless Steel Flat Washer
1 M8 Stainless Steel Locknut
1 Muffler Bushing (1-7/8" OD x 1-3/4" ID) from Pep Boys
Review of Parts List and Installation Diagram
While looking over the parts list and installation diagram, I noticed a flat washer shown on the installation diagram was not shown on the parts list nor was it in the bag of supplied hardware. I also noticed the Laser Pro Duro only has one rear mounting point unlike the stock and Big Gun series of mufflers. I decided to supplement the single M8 nut with an additional M8 Locknut with a nylon insert. This "belt and suspenders" method should reduce the risk of the supplied rear mounting nut from vibrating off and the potential for the entire muffler falling off in the process.
Test Fitting & Initial Installation Observations
Upon removing the muffler, intermediate pipe and hardware bag from the well padded box, I was impressed with the overall finish and quality of the components. The muffler and intermediate pipe were polished to a fine luster resembling chrome and all welds were neat and clean. The quality of the stainless steel components in the hardware bag was also very good. During my initial test fitting and installation process I came across a few minor fit problems which I will review in detail.
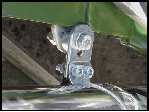
The first problem I ran across dealt with the rear mounting bracket. I had already made a mental note to pick up a M8 Stainless Steel Flat Washer and Locknut after reviewing the parts list and installation diagram, I added a M8 x 40mm Stainless Steel Bolt to the list when it became quite obvious not everything was going to fit on the supplied 20 mm long M8 Stainless Steel Bolt (see pictures below and to the left). I tried to omit the rear spacing collar, but the muffler would rub against and melt the rear fender without it.
The installation diagram was a little ambiguous about the placement of the rear mounting tab that is bolted to the rear sub-frame. I chose to insert the tab between the rear muffler clamp ends after trying various configurations. I believe there is a risk of crushing the outside "skin" of the muffler if the tab is not inserted between the rear muffler clamp ends due to the size of the clamp.
Care must be used when making fore and aft adjustments to the rear muffler clamp after it has been placed around the muffler. If the clamp is not fully disassembled when making adjustments, the outside of the muffler can be scratched easily.
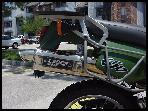
I elected to use about 1/2" of space between the rear edge of the muffler clamp and the Laser Pro Duro logo riveted to the side of the muffler. This adjustment made the intermediate pipe overlap the stock exhaust header by the same length as the stock exhaust system. Jeff Shingara reported on 9-28-01 that while using the OEM K-750 Dunlop 130/80-17 rear tire he noticed "brush" marks where the rear tire came in contact with the Laser Pro Duro, when the rear edge of muffler clamp was positioned 1/2" from the Laser Pro Duro logo. Moving the rear edge of the muffler clamp closer to the Laser logo should help prevent tire interference problems.
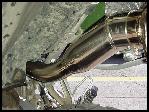
The muffler / intermediate pipe slip joint is a very tight connection. I found the two parts were slightly out of round with each other. The mating of these two parts is simplified if the intermediate pipe and muffler are rotated to find a position where they more easily slide together. After finding this position I rotated the muffler to the desired position on the intermediate pipe.
|
|
